


Do you know someone who loves glitter?! Luckily, with a little practice and preparation it is easy to make Glitter Tattoos for kids and adults!
Glitter tattoos can last from 3 -7 days if treated with care, and they are perfect for pool parties, dance clubs, sweet sixteen's, wedding receptions, and hot, sweaty days. Avoid hot water, scrubbing and rubbing, using lotions or oils, or picking at the design if you want your designs to last a long time. Kids and adults love the idea of getting a temporary tattoo. They can outlast a party and keep them smiling for days! Read below to see all the different options out there for creating cool temporary tattoos. You will need some special supplies if you want to have fun creating glitter tattoos. Read more below to learn how to do them yourself!
Skin Safe Body Glue
We sell a variety of brands of body glue, and they all work very well when making glitter tattoos. These glues do not contain latex, and they are medical grade adhesive that is designed to be used on the skin. You can see our selection at this link. These are perfect for making long-lasting kids' temporary tattoos that are comfortable and full of bling! You can also use Colorini instead of Glue and/or Glitter. Want to learn more about body glue? Click the link to read our Ultimate Glitter Tattoo Glue Guide!
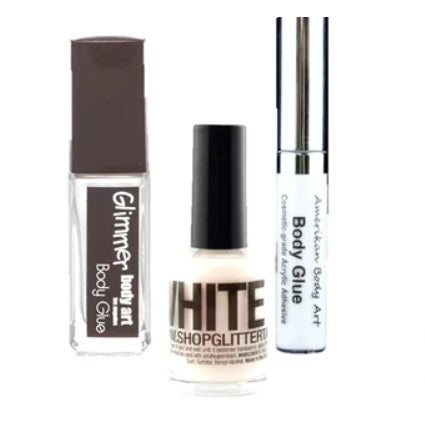
Cosmetic Grade Glitter

We strongly advise that you only use cosmetic-grade glitter when creating a glitter tattoo. Cosmetic grade glitter is polyester, .008mm or less, and hexagonally cut. You will want to avoid craft store glitter that might have metal, unsafe dyes, large pieces, or be cut in a way that could damage a person’s eye. Even if you are just tattooing an arm or leg, a breeze or fingers could transfer any loose glitter into someone’s eye, so be professional and play it safe!

Click here to find our selection of cosmetic-grade glitters that will make your glitter tattoos sparkle! Art Factory, Amerikan Body Art, Glimmer, and Vivid Glitters are great cosmetic-grade glitters to choose from!
Glitter Tattoo Application Tools
To make temporary tattoos, you can use cheap paint brushes, lip gloss sponge applicators, or the brushes that come in glue bottles to apply glue over stencils. You can also make your own temporary tattoos using free hand art bottles or cones to make very detailed designs, and you don’t have to clean brushes or throw them away. If you do ever need to clean up the glue from your tools, you will need rubbing alcohol or eucalyptus oil. If you need to clean it off the skin, you can use rubbing alcohol, oil, or a warm soak in the tub. Peeling the glue off the skin without softening it first can irritate the skin, so remove it with care. You can also visit our glitter tattoo tools page to find the perfect tools for your kit.

Glitter Tattoo Stencils
If you are nervous about how to design your own glitter tattoos, stencils are the way to go. They are pretty foolproof, and we sell a variety of triple layers stencils to choose from. If you want to make a display board, I recommend choosing 10- 20 designs at least and getting multiples of each design. Choose designs that will be good for the age groups you serve…and don’t forget that the adults will love glitter tattoos too! Look for stencils that will be easy to apply and pull off. Floaters will slow you down. Visit our great selection of glitter tattoo stencils. You can buy Art Factory stencils individually by clicking here, or you can buy Glimmer stencil packs by clicking here.

How to Make Temporary Glitter Tattoos


Steps to using the stencils:
- Prep the skin by having the area washed with soap and water if they have used any type of lotion on their skin, and then wipe it down well with rubbing alcohol. You can use cotton balls or those individually packaged wipes.
- Let the alcohol fully dry and then carefully remove the paper layer from the stencil, and place it on a smooth skin surface that contains little body hair. Avoiding excess body hair will make your design look better, and will be easier to remove. Glitter tattoos for kids last longer when you put them on areas of the body that they might be less tempted to pick at, like down by the ankle or on the upper arm. Those areas often have less body hair too.
- Using your hand or something firm (a business card works well), rub the stencil onto the skin so that there aren’t any gaps between the skin and the design.
- Peel off the clear top layer slowly. Watch for floating pieces, and grab those with your fingernail to make sure that they don’t come up with the clear layer. (For speed, avoid designs with floating pieces.)
- Cover the empty area of the stencil with a thin layer of glue. If you put it on too thick, it will take a long time to dry. If you accidentally put it on too thick, you can press the design with the clear layer to lightly pick up excess glue.
 Rose Bud Tattoo by Y Body
- Peel off the stencil carefully, making sure not to tug on any drying glue. If there are floaters, you can use a wood stick to pick them out.
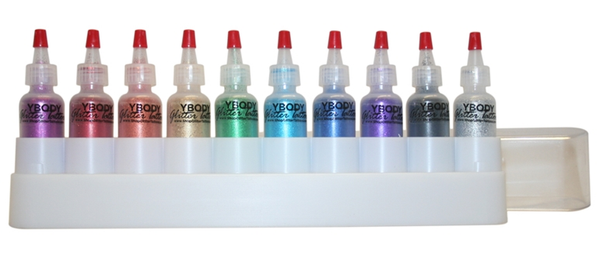
- Using a brush or a proofer, cover the stencil with a layer of glitter. You can use just one color or use a lot of colors. Just remember that the more colors that you add, the longer it will take to create the design.
- Brush the excess glitter off into a tray.
- O-o-o-h! and a-h-h-h! at the new sparkly creation that is sure to make your clients super mega happy!!!

Watch the video below to see the application of a peacock feather glitter tattoo done by my daughter.
Peacock Stencil used in Demo Video
How to Make Temporary Tattoos with Colorini or Festival INK
DIY temporary tattoos for kids and adults can look very realistic if you use Colorini.
Colorini is a temporary body ink that lasts, on average, 3-7 days, depending on how well you take care of it and where you put the design. Avoid hot water, scrubbing and rubbing, and lotions or oils if you want your designs to last a long time. The video below compares Colorini with other brands of body glue and glitter tattoos. Festival Ink is a new Ink very similar to Colorini, that also lasts for 3-7 days and is easy to use. Click here to see the Festival Ink by the Art Factory.
You can make Colorini / Festival Ink tattoos with stencils or by using the ink in a free-hand bottle/pen. You can also use a brush to make larger free-hand designs. You can remove Colorini and Festival Ink from the skin or from your brushes with rubbing alcohol. Kid's temporary tattoos have never looked so real! The butterflies were done with Colorini Black and Red with some Fuchsia glitter on top of the small butterfly. If you want an ink that is easier to wash off, check out Glimmer Body Arts' new Get INKED black Ink gel and Get Inked Kit.

Using Stencils to make temporary INK Tattoos
- Prep the skin by having the area washed with soap and water if they have used any type of lotion on their skin, and then wiping it down well with rubbing alcohol.
- Let the alcohol fully dry and then carefully remove the paper layer from the stencil, and place it on a smooth skin surface that contains little body hair. Avoiding excess body hair will make your design look better, and will be easier to remove.
- Using your hand or something firm, (a business card works well), rub the stencil onto the skin so that there aren’t any gaps.
- Peel off the top clear layer slowly. Watch for floating pieces, and grab those with your fingernail to make sure that they don’t come up with the clear layer.
- Using a brush, cover the empty area of the stencil with a thin layer of Colorini. If you put it on too thick it will take longer to dry and it could bleed under the stencil. You can limit the risk of the color bleeding under the stencil by lightly loading a wedge sponge with Colorini, and then tapping it over the stencil. You can use more than one color, and you can blend and mix the colors on the design.
- Peel off the stencil carefully, making sure not to tug on any drying Colorini. If there are floaters you can use your fingernail or a wood stick to pick them out. (For speed, avoid designs with floating pieces.)
- If you want to add glitter to your Colorini design, do so when the Colorini is still wet and tacky.
Using a free-hand applicator bottle to create your own free-hand Colorini and Glitter Tattoo designs
- Prep the skin by having the area washed with soap and water if they have used any type of lotion on their skin, and then wiping it down well with rubbing alcohol.
- The free-hand pen requires very little squeezing to create these designs. Usually just a slight pinch will get the medium flowing, and it will keep flowing at a nice rate as long as you keep the bottle at an angle.
- You can use a transfer pencil, paper and alcohol to transfer a pre-drawn design onto the skin, and then go over it with Colorini, Festival Ink, body glue or both.
- If you want to go totally free-hand with your temporary tattoo, just start in the center or one side of your imagined design, and expand the design out, letting your creativity go wild!
- The benefit to going free-hand is that you can really use the body as a guide for a very natural flow of the design. You can make bracelets, arm wraps, rings, belly wraps, necklaces or entire sleeves. DIY temporary tattoos with Festival Ink or other temporary tattoo inks will set you apart and show off your artistic skills.
- Use rubbing alcohol on a cotton swab to fix any mistakes on your temporary tattoo.
- BLING IT UP! Add glitter to the wet Colorini or Festival Ink if you would like, or add glitter and/or mica powders to the semi-dry glue.
How to Create Your Own Temporary Tattoos with Skin Pens
Create and make your own temporary tattoos with ease by using these skin safe markers/pens.
Kryolan Skinliners skin pens are used to make realistic-looking temporary tattoos. These are basically a fine-tipped marker that is skin safe. Since these pens are not waterproof, I recommend putting them on the upper arm or on the leg or any area that is least likely to come in contact with water during the day. These are fun for regular events or to help people design and try a potential permanent tattoo.
- If you want to make temporary tattoos that last, prep the skin by having the area washed with soap and water if they have used any type of lotion on their skin, and then wipe it down well with rubbing alcohol.
- You can start with a light outline of the design and then gradually build up the color by adding multiple layers of the same color, or switching to darker or complimentary shaded pens. Complimentary colors you say? Yes! To get an authentic temporary tattoo look try to avoid black for darkening a shade of a color. Instead make a dark yellow by blending in purple, a dark red by blending in green, a dark orange by blending in blue, and vice versa.
- Use the Tat2U OOPS! pen to correct mistakes or to blend colors. A nice black outline once you are all done using the colors will finish off the look!
- Use alcohol to wash off skin pen designs. Some colors may leave a faded stain on the skin for a couple of days. Though I have been able to wash them off myself easily when used over face paint (using soap and water), I would not recommend using them excessively on the face since they can be temperamental and might stain the skin longer than some parents might like.

How to Create Your Own Temporary Glitter Tattoos for the face with Washable Glue
- You can use Art Factory Glitter Stick Washable Glue on the face to enhance your face painting designs. There is no prep needed. The glue will hold glitter for most of the day if you keep it dry and do not pick at it. You can remove the washable glitter tattoos for kids with soap and water. Check out the video below! The Sweet Cheeks Kit pictured below is just for washable tattoos that you can use on the face!
- To create a glitter tattoo on the face you can use regular plastic stencils over face paint or directly on the skin. TAP Stencils are a perfect size for adding little glittery accents. You can also use the brush in the bottle or a thinner brush to draw free-hand designs. Try to apply a thin even layer of the glue so that it doesn't take too long to dry.
- To create the glitter tattoo effect, apply the glitter while the glue is still wet. Once the glue is dry it will no longer be tacky.
- Brush off excess glitter if needed.
- You can use regular tattoo stencils but I would use them with caution on the face since they are rather sticky, peeling them off might surprise your customers!
