


Jest Paint | Face Body and Brush Soap - BRUSH and BODY WASH - 4.25 Fl oz.
10+ In Stock!
Having a good set of face painting brushes is key to delivering great quality face painting. Your brushes are your tools, and if they are not in good shape then they will make your line work look bad, your strokes won't look clean and your overall quality of work will suffer.
Apart from starting with good quality face painting brushes, the second best thing is taking good care of them. Keep in mind though, that as all tools, they have a life span, and once you reach it you will need to replace them.
Read our blog post below to get the best brush repair tips along with suggestions on how to better care for your brushes.
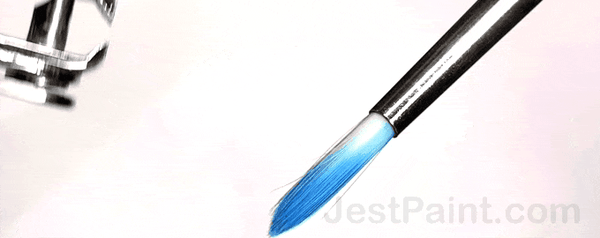
We can write an entire blog post about this and we will likely do it at some point, but for now lets focus on the main thing: you need to use brushes with synthetic bristles. Natural bristles are too soft and they are not meant to work with our style of paint.
There are different kinds of synthetic materials, some imitate natural bristles while others are stiffer and have a great bounce. Your best option is to buy your brushes from a face paint store since they will only sell you brushes designed for face painting.
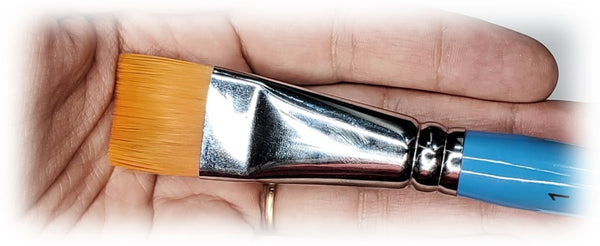
You can choose wooden handle or acrylic handle brushes. Wooden handle brushes are less expensive but the paint can start to chip at some point. Acrylic handle brushes will give you a very long life for your handle, but the bristles will last for just as long as the ones on your wooden handle brushes and you might have more issues the the ferrule coming loose.
Brushes come with wide handles, long handles, thin handles, short handles, longer bristles, shorter bristles, it is up to you and what you are looking for to decide which kind is best for you. Once we write our blog post about the best kind of face paint brushes we will go into more details about their shapes and sizes.
Taking care of your face painting brushes while painting is important to reduce the wear and tear they are exposed to.
When loading your paint, if you are using round brushes make sure to make circular motions to load your brush, never press down splitting the bristles, but rather swirly it around making sure the bristles are always together. For flat, filbert and angular brushes, load them back and forward, gently, making sure the bristles do not get bent side ways.
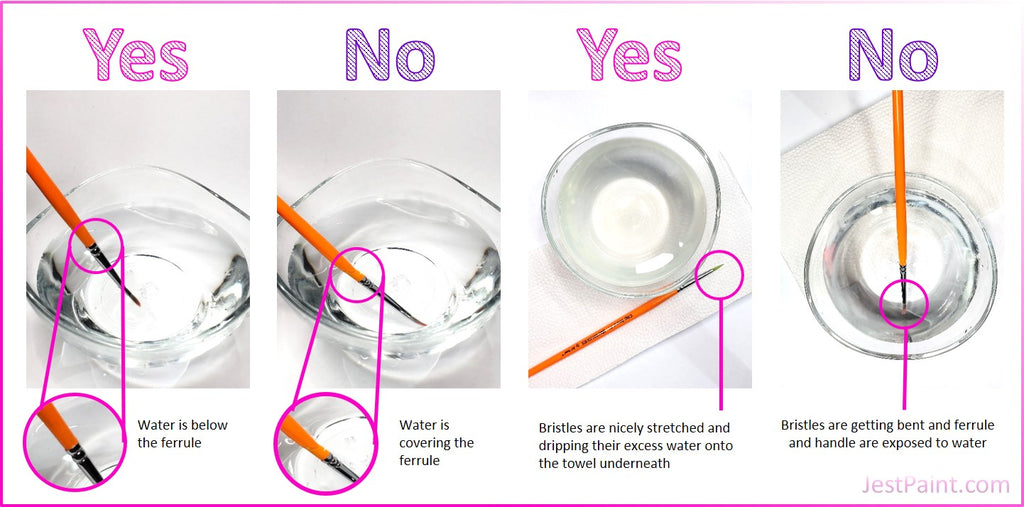
While face painting make sure try not to dip your brush into the water past the ferrule. If the water touches the wooden handle it can start loosening up the paint and the glue that holds the ferrule and the handle together. I love using the Rinse Well brush cleaning system because the dish is shallow, so I am less likely to dip my brush above the ferrule, and I can rise the dirty water away whenever I want to.
Never leave your brushes sitting in your water cup. That puts pressure on the bristles and it might bend them. I also love the Rinse Well because you can't leave your brushes sitting in it, soaking up the water. Once you are done using a brush make sure to leave it laying down over a towel or back in to your brush wallet. You can stand your brush wallet on it's side if you want to let them dry sideways. Having them laying down or even hanging upside down is best since that way the left over water can drip off your brush instead of getting into the ferrule.
Try keeping your brushes away from direct sunlight as the heat and light can weaken and dull the paint covering the handles.
Cleaning your face painting brushes is another key aspect of brush care. Cleaning your brushes while painting and after each gig will allow them to last a lot longer.
Need more detailed instructions on how to sanitize your brushes? Read our How to Sanitize and Clean your Face Painting Brushes and Sponges blog post for more information.
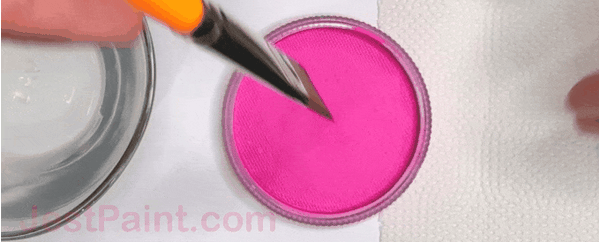
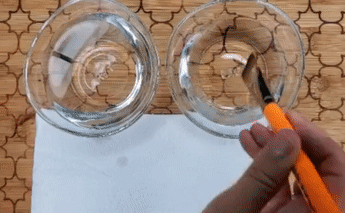
While you are painting make sure to swish your brushes gently in your water cup making circular motions for your round brushes, and back and forward motions for your flat, angular and filbert brushes. You can add a few drops of Jest Paint's Brush and Body Wash to your water to help remove the pigments off the bristles faster and reduce the amount of friction needed to get your brushes clean. You can add a gentle brush cleaning pad at the bottom of your brush cup to help remove the pigments even faster.
10+ In Stock!

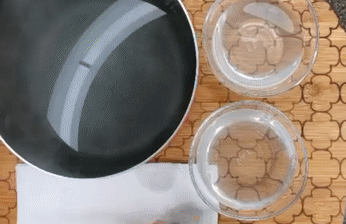
Once you are back home, take each brush and add a little bit of brush soap to your fingers and gently rub the bristles in between your fingers, or back and forth against the palm of your hand, following the natural shape of the bristles, making sure to work the soap all the way to the base of the brush (where the bristles meet the ferrule). Then, proceed to gently rinse them under water working the bristles in between your thumb and index finger to remove all pigment and soap.
Now is the time to let your brushes dry. The best idea is to hang them upside down. You can tie them to a rubber band and attach them to a tall pop bottle, or use special brush holders designed to hang brushes upside down. If you can't do this, lay your brushes flat on top of a dry towel so water can drip off the brush.
Once the brushes are completely dry you can put them away.
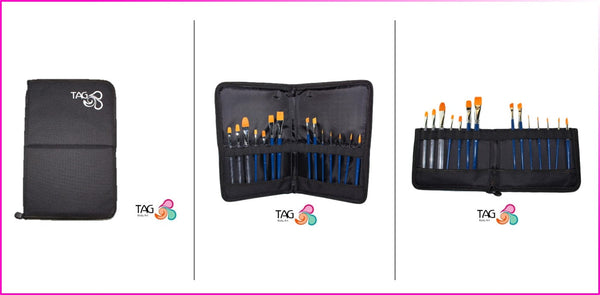
Storing your face painting brushes is a very important aspect of your brushes life. Keeping them away from harm in a sturdy case is a great idea. Brush wallets or easels are very popular because you can keep each brush in its own separate position held on by an elastic band and pressed against a sturdy surface to prevent the bristles from getting bent. Do not overload your brush wallet or the bristles will start touching against each-other causing some of them to bend out of shape.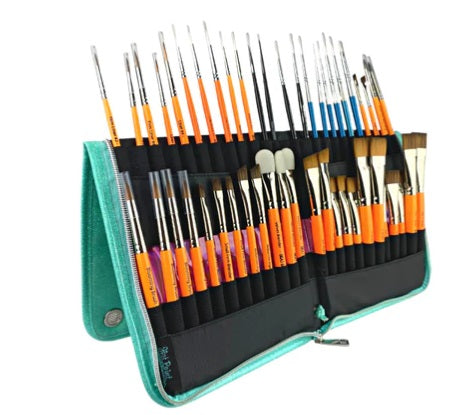
New Jest Paint Brush Wallet above and TAG Brush Wallet below
Some painters prefer to use plastic cases or mesh zipper pouches to keep their brushes while in storage. Keep in mind that your brushes should be cleaned and completely dry before they are put away to prevent water damaged and potential bacteria growth cause by humidity.
The three most common issues with face painting brushes is bent bristles, chipped paint and the ferrule getting unglued. We will cover each one bellow.
If some of your brushes have bent bristles there are a few things that you can do to repair them. First of all, make sure to clean your brushes well. When pigment accumulates by the ferrule it pushes the bristles around making them get out of shape.
If that doesn't fix it, the next step is to submerge the bristles into boiling water for just a few seconds at a time until the bristles go back into shape. Sometimes it might need to keep the bristles in the water for up to a minute. Please make sure not to ever dip the ferrule in the hot water, as that will loosen the glue that holds the bristles together and your brush will come apart. Try dipping them two or three times and then shape the brush with your fingers using a little bit of hair gel and let them dry handing upside down or laying down on a dry towel.
If all of this doesn't do the trick, your last resource to repair your brushes is to use a nail clipper to clip the bristles that are bent out of shape or sticking to far out. Carefully pick one bristle at the time and clip it at the base (if it is bending outwards) or clip the top end (if it is sticking too far out).
If the paint on your brushes has started to chip it is best to re paint them. Many painters use nail polish to paint their brushes as it provides a water proof finish that is highly resistant. You can also buy special lacquers at the paint store designed for wood that is exposed to water and sunlight. Just make sure that you do one coat at a time and let it dry fully so you don't get any drips; just like you would when you are painting a wall or furniture. You can cover the ferrule with tape to avoid getting the ferrule painted.
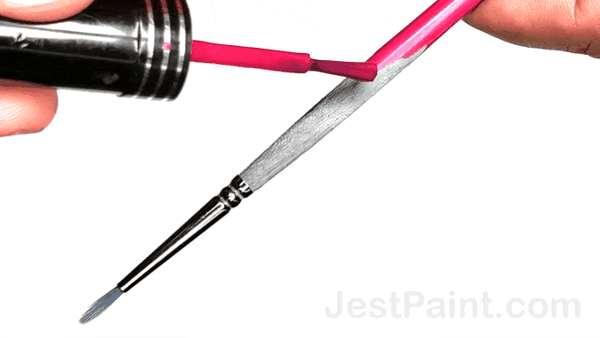
If the ferrule came undone from the handle all you need to do to repair your brush is add a few drops of super glue to the end of your handle and stick the handle back inside the ferrule. Keep the two pieces together for a minute and then lay your brush flat for 24 hours so that the glue can thoroughly dry. Now your brush is ready to go!
You will notice that at some point, no matter how well you took care of your brushes and how many times you followed all of the steps above, eventually, your brushes will need to be replaced. Some face painters change their brushes up to once a year, mostly their round brushes that experience the most use. Keep in mind that professional good quality brushes cost just a few dollars each, is not a big price to pay for keeping your work looking sharp and professional.
Want great designs? Keep great tools at hand! Browse our professional face painting brush section now.
In every profession tools need to be replaced with time, so that you can do your work the right way, and it is no different with face painting.
If your brushes are already needing to be replaced, take a look at our face painting brushes section to see all of the great quality brushes that we have in stock for you.
Thank you so much for reading our blog. Please feel free to browse our related blog posts below and leave as a comment with your ideas!
Comments
Leave a comment